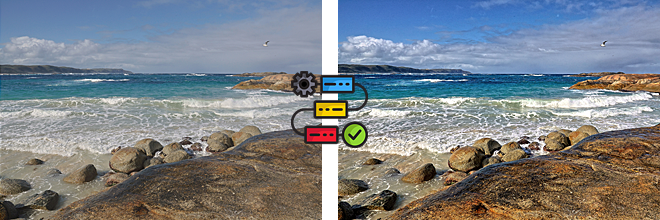
High Dynamic Range Capture and Tone Mapping (Optimised SDR)
Most humans can see around one million different colours and have 20 stops or more of dynamic range, rarely encountering true white or black. As we look around a scene our eyes dynamically adjust based on the subject matter.
Stereograms using the JPEG format, by comparison, are limited to 8 stops of dynamic range which restricts them a maximum of 256 levels in each of the red, green and blue colour channels with a maximum potential of just over 16.7 million colours.
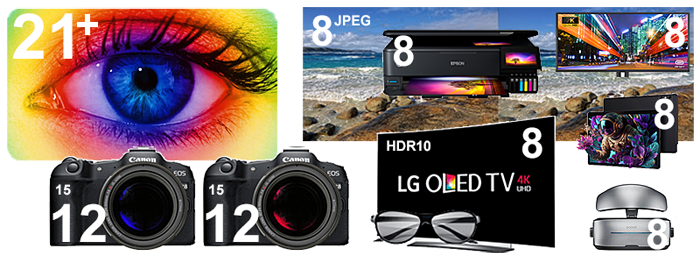
The range of 16.7 million colour available in the JPEG format exceeds that which can be perceived by the human eye but the deficit in terms of dynamic range is significant. This deficit can be contained if we simply restricted our photographs to subject matter where the tonal range never exceeds the practical dynamic range of the camera used to capture the digital image but this may not be an acceptable limitation.
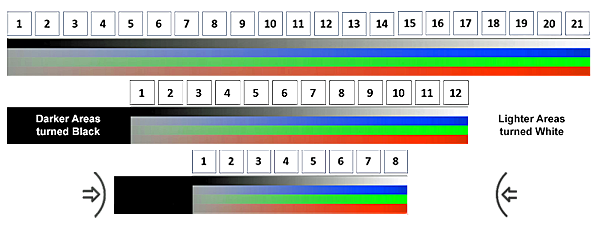
When capturing photographs where there is significant contrast between light and dark tones such as with landscapes and architecture there may be 21 stops of more of dynamic range involved. Compressing the full dynamic range as seen by the human eye into an 8 stop format without turning the darker areas completely black and the lighter areas completely white will require more than just a single digital exposure. Digital cameras typically use 10 to 14-bit A/D converters, and so their theoretical maximum dynamic range is between 10-14 stops with some more advanced digital cameras reaching marginally higher to about 15 stops. This technical dynamic range does not equal their Practical Dynamic Range because at lower levels of light it becomes harder to distinguish the image signal from the background noise produced by the sensor. This makes the practical or usable dynamic range around 2 to 3 stops less at 12 stops.
High Dynamic Range Capture Technique(s)
Simply applying dynamic range compression cannot overcome the problem that some of the desirable tonal range (detail) will not be captured by the camera sensor due to it being restricted to 12 stops for any given exposure. An effective solution, albeit with some limitations, was invented with adoption of what is called the High Dynamic Range (HDR) technique which gives you a range of options to choose from when editing.
The HDR Technique, sometimes referred to as Exposure Bracketing, is a technique often available as an automated option in some digital cameras, where multiple images of 'exactly' the same subject matter are captured at several different exposures. Given the time it takes to capture these multiple exposures, it is typically, but not always, used for static subjects with the cameras mounted on a tripod.
Staggered HDR decreases the amount of time between exposures that requires an image sensor that can be read concurrently. Subsequent exposures are read from the upper part of the sensor while the previous exposure is still being read from the lower part of the sensor.
Fast-moving subjects, or camera movement between the multiple exposures, will generate a "ghost" effect or a staggered-blur strobe effect due to the merged images not being identical.

Depending on the total dynamic range present in the subject matter, using 3 exposures (one normal, one over-exposed by 3 stops, and one under-exposed by 3 stops) still may not cover the entire dynamic range of your subject matter. Depending on whether you want to capture more detail in the highlight or shadows, this can be compensated for by moving the exposure of the initial normal exposure to the right or left. Some cameras allow you to increase the total number of exposures in the 'bracket' in increments of 2 (adding an additional over and under exposure respectively) to extend the total dynamic range covered.

Combined High Dynamic Range capture using +/- 3 Stops on a 12 Stop base.
Some lost shadow and highlight detail.
For best results when using exposure bracketing always keep the aperture the same between the shots, shoot in Aperture Priority mode. You do not want to have images with different depths of field.
Use the bracketing function of your camera and shoot in 3 EV steps if you are doing three brackets (-3, 0, +3), 2 EV steps if you are doing five brackets (-4, -2, 0, +2, +4), or 1 EV steps if you are doing seven brackets (-3, -2, -1, 0, +1, +2, +3).
Watch out for wind - too much of it will move bushes/grass/trees, which will adversely affect your final image. Shoot frames quickly in bursts, especially if you have clouds in the frame. Watch out for other moving objects. It is still best if movements are minimal - motion is difficult to fix in software.
Exposing to the Right or Left
Exposing to the right (ETTR) is the technique of adjusting the exposure of an image as high as possible at base ISO (without causing unwanted saturation) to collect the maximum amount of light and thus get the optimum performance out of the digital image sensor. With the advancement of digital image sensors, the same ETTR technique may be applicable to scenes with a relatively high dynamic range (HDR) (high contrast within both bright highlights and dark shades in harshly lit scenes), previously in the domain of HDR techniques involving multiple exposures.
Exposing to the Left (ETTL) is the technique of adjusting the exposure of an image as low as possible in such a way so the histogram is shifted as far left as possible without clipping the shadows. The image will look under-exposed. In post, the image is adjusted to a more standard exposure.

Combined High Dynamic Range capture using +/- 3 Stops on a 12 Stop base moved to the right (ETTR).
Lost shadow detail only.

Combined High Dynamic Range capture using +/- 3 Stops on a 12 Stop base moved to the left (ETTL).
Lost highlight detail only.
Canon has recently introduced an alternative method for capturing higher dynamic range images called 'Moving Subjects' HDR mode where 3 different exposures are capture simultaneously by the sensor at a cost of a higher minimum ISO of 800.
High Dynamic Range Capture Requirements
Capturing the source images required for use in a tone mapping LDR/HDR workflow to generate optimised SDR images can be done in a variety of ways but there are a few base requirements that will need.
Digital camera(s) +/- Tripod
Preferably a stereo rig using two compact full frame mirrorless/DSLR cameras and a monopod/tripod if your workflow uses exposure bracketing.
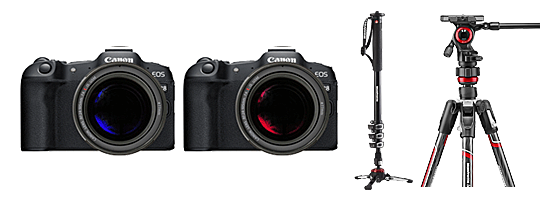
Exposure Bracketing is a technique available as an automated option in some digital cameras where multiple images of 'exactly' the same subject matter are captured at several different exposures. This technique gives you a range of options to choose from when you're editing. Given the time it takes to accomplish multiple shots, it is typically, but not always, used for static subjects with the cameras mounted on a tripod. Exposure bracketing is not suitable for moving subject matter. A fast-moving subject, or camera movement between the multiple exposures, will generate a "ghost" effect or a staggered-blur strobe effect due to the merged images not being identical. Unless the subject is static and the camera mounted on a tripod there may be a trade-off between extended dynamic range and sharpness.
Although you can get away without a tripod by shooting hand-held in brackets and let the HDR software automatically align the images, It is still recommended to shoot with a tripod to get the best results. Aligning images works most of the time, but you will lose a portion of the image.
Once you have captured your source images you will need process them using software packages that can perform Low Dynamic Range (LDR) and/or High Dynamic Range (HDR) processing and Photo Editing.
Examples are: Easy HDR, Photomatix Pro, Affinity Photo, Adobe Lightroom, StereoPhoto Maker, Adobe Photoshop, Topaz Photo AI, Topaz Sharpen AI.
High Dynamic Range Capture Formats
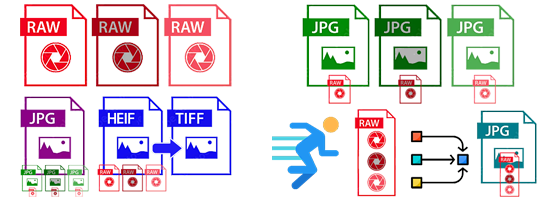
Single images captured in either RAW (14 bit), JPEG (8 bit) or TIFF (8/16 bit) format; Multiple images (minimum of 3) captured in RAW (14 bit) format using Exposure Bracketing / Staggered HDR; Multiple images (minimum of 3) captured in JPEG (8 bit) format using Exposure Bracketing / Staggered HDR; Single images saved by in-camera processing as either JPEG (8 bit) or HEIF (10 bit) format from Multiple Exposures (minimum of 3) using Exposure Bracketing / Staggered HDR. HEIF format images may need to be converted to TIFF (8/16 bit) format for processing due to the use of unsupported codecs; or Single images saved by in-camera processing as JPEG (8 bit) format from Multiple Exposures (minimum of 3) captured at the same moment (Synchronous HDR).
High Dynamic Range Post Production Processing
Before using Tone Mapping there are a number of post-production corrections that you should apply corrections to images for a number of issues such as Lens Distortion, Perspective Distortion, Rotational Alignment, Chromatic Aberration, Image Noise and Tone Level Issues.
Some of these corrections should only be applied once and may compete with software lens corrections applied by the manufacturer when a jpeg image is saved in-camera. This is particularly relevant for Lens Distortion correction and you need to know whether it has already been applied or not. Lens Distortion corrections need to be applied to the left and right images separately as the first step in a stereoscopic post-production workflow as they cannot be applied to a single stereogram containing both left and right images.
Step 1 - Lens (Distortion) Correction
The two most common types of lens distortion are barrel distortion and pincushion distortion. Barrel distortion is where straight lines bend outward from the centre of the image. Pincushion distortion is where straight lines bend or "pinch" inward from the centre of the image. Wavy distortion - sometimes also called moustache distortion - is a mixed distortion, it is a radial image distortion introduced by the lens itself. It often shows barrel distortion near the centre and pincushion distortion along the edges.
Lens correction requires the use of previously measured parameters. from the Lensfun database of cameras and lenses allowing automatic operation, if the camera and lens are found in the database. However, as lens correction makes sense only once, you need to know whether it has already been applied or not.
Camera doesn't do any lens correction - both JPEG and RAW need to be corrected by software. Camera applied lens correction - JPEGs are corrected (at least partially), but RAWs need software correction when they are developed.
Apart from fixing the chromatic aberration by applying LensFun coefficients to slightly resize the colour channels in the image, easyHDR brings also an automatic de-fringing algorithm. It is capable of further reducing the colour fringes around distinct edges. It does not require the camera and lens to be defined in the LensFun database. For defringing, you can control its strength and hue selectivity.
The following examples show 'Barrel Distortion', 'Pincushion Distortion', 'Wavy (moustache) Distortion' and 'Corrected - No Distortion'.

Step 2 - Chromatic Aberration Correction
Chromatic Aberration can appear as Red/Cyan, Green Magenta or Blue Yellow fringes. With lenses that suffer from chromatic aberration, the construction of the lens elements and the position of the focal plane will determine what type is contained in the captured image.
There are two types of chromatic aberration. The first is lateral or transverse chromatic aberration. This occurs when different wavelengths of light are dispersed across the surface of a camera's imaging sensor. The second type of chromatic aberration is called longitudinal or axial aberration. This is when the different wavelengths of light are focused at points in front or behind the surface of the camera sensor.
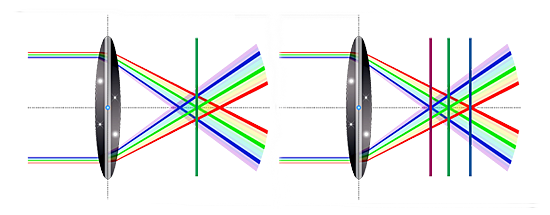
Longitudinal or axial chromatic aberration
The degree of chromatic aberration varies according to the focal length and distance, algorithms can factor in these two key parameters to correct chromatic aberration in RAW and JPEG images more effectively. Software correction achieves this by applying coefficients to slightly resize the colour channels in an image with additional correction achieved through the use of defringing algorithms that can further reducing the colour fringes around distinct edges.

Before and after chromatic aberration correction
Using the Lensfun library

The Lensfun library provides an open source database of photographic lenses and their characteristics. The Lensfun library not only provides a way to read the database and search for specific things in it, but also provides a set of algorithms for correcting images based on detailed knowledge of lens properties. Right now, Lensfun is designed to correct distortion, transversal (also known as lateral) chromatic aberrations, and vignetting
Step 3 - Perspective (Keystone) Correction
Perspective or keystone distortion occurs when the camera lens is not perpendicular to the surface being captured, as when you are pointing your camera up at architecture.
In photography, the term is used to describe the apparent leaning of buildings towards the vertical centre-line of the photo when shooting upwards, a common effect in architectural photography. Likewise, when taking photos looking down, e.g., from a skyscraper, buildings appear to get broader towards the top. The effect is usually corrected by either using special lenses in tilt-shift photography or in post-processing using modern image editing software.

Step 4 - Perspective (Keystone) Concerns specific to Stereoscopy
In stereoscopy, two lenses are used to view the same subject image, each from a slightly different perspective, allowing a three-dimensional view of the subject. If the two images are not exactly parallel, this causes a keystone effect. This is particularly noticeable when the lenses are close to the subject, as with a stereo microscope, but can also a common problem with 3D stereo dual camera rigs if the two cameras are not kept in parallel alignment.

Step 5 - Rotation (Level) Correction
Of all the potential issues that could distract from the quality of your work as a photographer, a crooked or badly rotated image can be one of the most challenging to identify and correct. Rotation issues Elements in the photo appear slightly tilted. Whether your subjects are standing on a sloping hill or the camera is unintentionally tilted at the wrong moment, photos can end up slightly off centre. This can often happen when shooting at the beach, and your horizon line is very evident. Even when the effect is subtle, it can distract from the overall quality of your photography work.
You took the original photo at an angle. As a photographer, you are sometimes forced to take a photograph from an unusual angle in order to get the shot that you want. Maybe there is a particular object in the way, or you need the angle to fit in the full wedding party and the scenery within the frame.

Step 6 - Image Noise Reduction
Image noise is random variation of brightness or colour information in images, and is usually an aspect of electronic noise. It can be produced by the image sensor and circuitry of a digital camera. The purpose of noise reduction is to decrease the noise in natural images while minimizing the loss of original features and improving the signal-to-noise ratio.

Tone Mapping
Tone Mapping is a technique in post-processing that adjusts the brightness and contrast of High Dynamic Range (HDR) images to make them look natural and detailed on standard screens.

Simply put, tone mapping deals with reducing the tonal values within a photo to make them suitable to be viewed on a digital screen. For example, an HDR photo that has a 100,000:1 dynamic range needs to undergo tone mapping so that the tonal values fall between 1 and 255 for each colour channel (red, green and blue). This being the maximum range of tones for each colour that can be represented and displayed in an 8-bit JPEG image.

LDR Tone Mapping from Single Exposure Left and Right Images
You can create optimised left and right LDR images from single left and right images, as long as both the brightest and the darkest parts of the total dynamic range are somewhat recoverable. What this means, is that your brightest part of the subject matter in the images should not be completely blown out, while the darkest part of the subject matter should not be pitch black in the images.
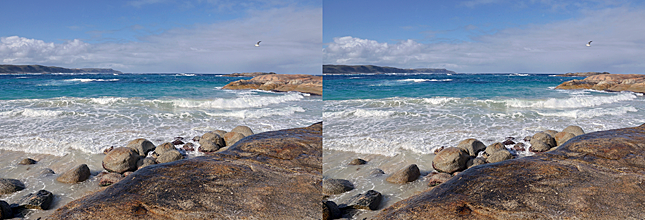
LDR Tone Mapping from a Multiple Left and Right Images
You can create optimised left and right LDR images from multiple left and right images, as long as both the brightest and the darkest parts of the total dynamic range are captured across the multiple images. What this means, is that your brightest part of the subject matter should not be completely blown out in each low exposure image, while the darkest part of the subject matter should not be pitch black in each high exposure image.
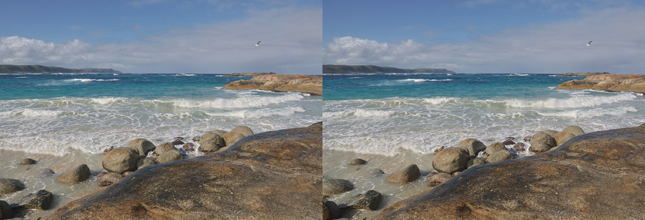
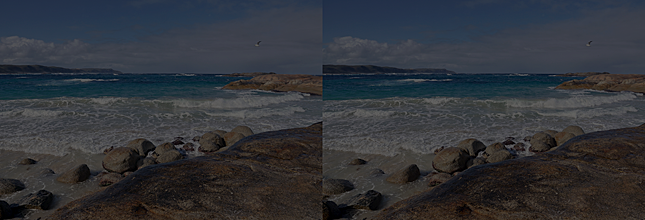
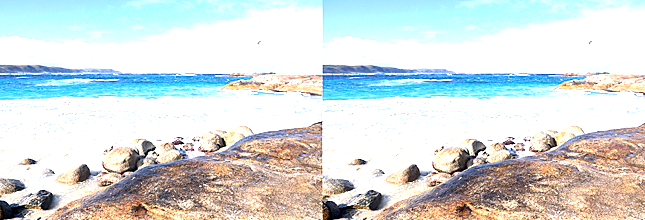
LDR Tone Mapping from Single Left and Right Moving Subjects Images from Canon
Canon cameras with Moving Subject HDR mode will output an LDR image in a single frame, eliminating the ghosting seen with multi-shot HDR mode. For each shot, images captured across a wide range of exposures are merged (one shot captured at a base ISO of 800).
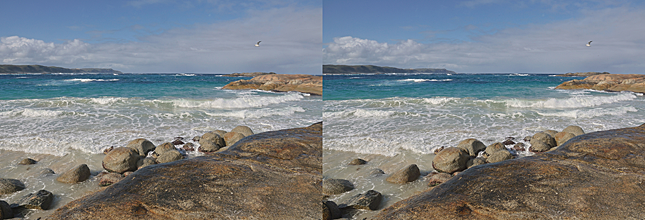
Saving the Tone Mapped JPEG Outputs
The output of the Tone Mapping process will be an adjusted left and right images where the brightness and contrast of each image looks natural and detailed on a standard screen.
Post Production - Photo Editor
Process the corrected and Tone Mapped left and right images separately in your chosen Photo Editor to perform the following to suit your personal preference. Tone adjustment, Contrast adjustment, Level adjustment, Noise Reduction, or Sharpening.
These global and selective adjustments such as brightness, hue, saturation and contrast should be aimed at restoring the appearance of the original scene.
Post Production - StereoPhoto Maker
Process Stereo Pairs in StereoPhoto Maker to perform the following to suit your personal preference. Left and Right image Alignment, Colour Adjustment, Rotation Alignment, Vertical Perspective Correction, Horizontal Perspective Correction, Keystone Correction and Final Window Alignment (removal of violations/optimisation).
Colour adjustment uses histogram-matching to try to adjust the colour/brightness of the left and right images. By default, the left image is taken as reference but there is a menu option to make the right image reference.
Save Optimised JPEG Output as SBS JPEG or MPO Files
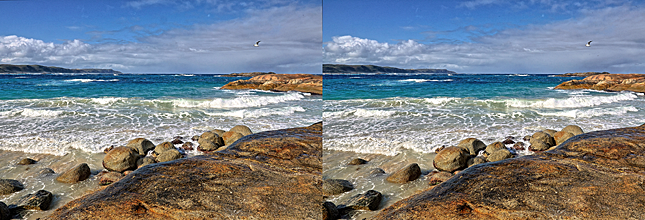
Tone Mapped Optimised JPEG Output (Download)
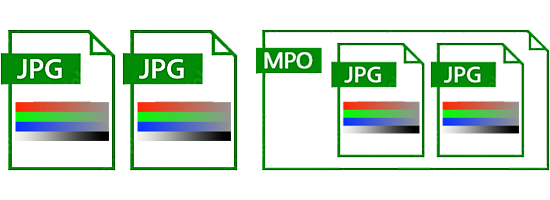
The individual left and right images produced can be saved as an optimised Side-by-Side JPEG or as an MPO File containing the two JPEG files concatenated together.
 High Dynamic Range Capture and Tone Mapping Workflow.
Guide for performing High Dynamic Range Capture and Tone Mapping.
...
Jeff Ewen 3D - creating real digital stereoscopic photographs.
Contact me by clicking here.